

How To Build A Full Stack App
Learn how Full-stack apps work by building a simple one using JavaScript (Part 1)
Learn how full-stack application works by building a simple fake weather API
![]()
This tutorial will walk you through the process of creating a simple fake weather API (fake because the data we are using is made up). After that we will build a simple front-end form and fetch data from our API. If you are new to Node and Express or are a front end developer that wants to get an idea of how the API's you are fetching data from work, then this article is for you.
Part 2 — Build a front-end app that can get data from a back-end API
Please note that what we are building is very simple but the concepts we touch on are the same ones used to build larger applications.
This is a two part series. You can find part two here. In this part we will only be the back-end part of our app
Step 1: Project Setup
Before you can dive deep into the tutorial you will need the following:
- Node (I am using v10.11.0)
- npm (I am using 6.4.1)
- A Text Editor (I am using VS Code)
- A browser (I definitely recommend Chrome or Firefox)
Note that you do not need to have the exact version of Node and npm as I have for this to work. If you get any trouble getting these configured then please comment below and I will be happy to help. Once you have these setup its time to download or clone the starter code. You can find the files on my Github. Don't worry if you don't understand what every file in the repository does, we will walk through each relevant file and its function.
Step 2: Understand the starter files
If you successfully cloned the starter code repository then this is the file structure you should have:
              /Fake-Weather-API
                .gitignore
                README.md
                data.js
                index.js
                package-lock.json
                package.json
First things first, lets check out our package.json file
              {
                "name": "fake_weather_api_starter",
                "version": "1.0.0",
                "description": "",
                "main": "index.js",
                "scripts": {
                "test": "echo \"Error: no test specified\" && exit 1"
                },
                "author": "Maher Alkendi",
                "license": "ISC",
                "dependencies": {
                "express": "^4.16.4"
                }
}
This file contains the main information about our app. Note that we only have one dependency, which is express. Express is a Web Framework that makes it easy to build server-side applications using node. Read more about it here.
Next we look at our index.js file
              const express = require('express'); // import express
const app = express(); // initialize express              // Listen on port 3000
app.listen(3000, function() {
                console.log('listening on port 3000...');
})
All this code does is initialize an express server on port 3000. We will add more functionality to it as we go.
Now lets checkout the data.js file
              const fakeWeatherData = [
                {
                'city': 'muscat',
                'temperature (C)': '37 C',
                'temperature (F)': '98.6 F',
                },
                {
                'city': 'tokyo',
                'temperature (C)': '16 C',
                'temperature (F)': '61 F',
                },
                {
                'city': 'moscow',
                'temperature (C)': '18 C',
                'temperature (F)': '64 F',
                },
                {
                'city': 'sydney',
                'temperature (C)': '17 C',
                'temperature (F)': '63 F',
                },
                {
                'city': 'london',
                'temperature (C)': '16 C',
                'temperature (F)': '66 F',
                },
                {
                'city': 'johannesburg ',
                'temperature (C)': '24 C',
                'temperature (F)': '75 F',
                },
];              module.exports = fakeWeatherData;
This file contains our fake weather data. It contains an array of objects called fakeWeatherData. Each object has a key for city, temperature in Celsius and temperature in Fahrenheit. At the bottom of the file we are exporting this array. Please note that this is fake data that I made up. In a real application this information will most likely be coming from a database.
In addition, we have our .gitignore files which ignores our node_modules folder.
OK these are the main files of the starter code. Now lets start building our fake weather API!
Step 3: Build Fake Weather API
Before we start writing any code, don't forget to type npm install on your terminal to install all dependencies (in this case its only express). Now open up the index.js on your Text editor. Lets start by making our app return some json when it gets a GET request on the root directory.
              const express = require('express'); // import express
const app = express();  // initialize express              // GET route
app.get('/', function(req, res) {
                res.send({'hello': 'world'})
})              // Listen on port 3000
app.listen(3000, function() {
                console.log('listening on port 3000...');
})
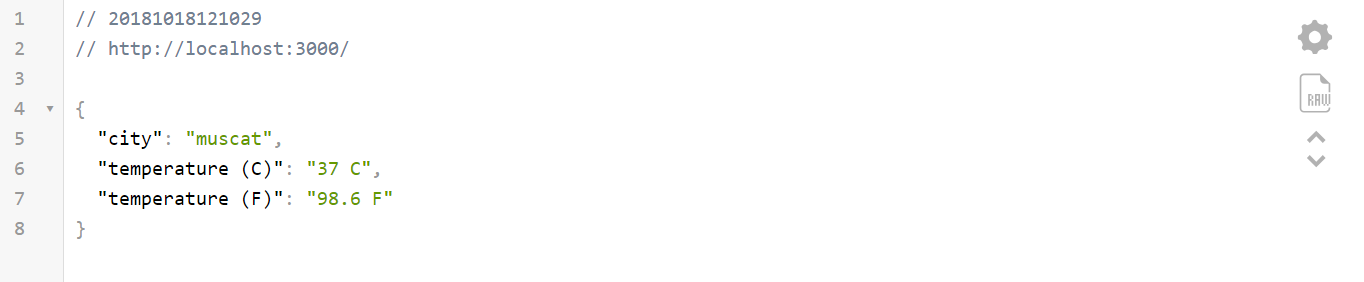
If you go to your terminal and type node index.js then open up your web browser and navigate to http://localhost:3000/ you should get back some json

You should be getting the same data but your json may not look as clean as the image above. If you want your browser to format the json data then check out this chrome extension. Once you get it you should automatically be getting clean formatted json.
Lets now try to send out some of our fake weather data using our app. First we need to import the fake data from our data.js file. Then lets try and send out the first data item in our fakeWeatherData array when a GET request is made.
              const express = require('express');   // import express
const app = express();  // initialize express
const fakeWeatherData = require('./data.js'); // import fake data              // GET route
app.get('/', function(req, res) {
                res.send(fakeWeatherData[0]);
})              app.listen(3000, function() {
                console.log('listening on port 3000...');
})
Once you've made these changes restart your express server by pressing ctrl + C then typenode index.js. You should see this:
Nice! we now can send our fake data to a user when a GET request is made. Lets allow the user to input a city name and get the temperature data if its available. We do this by checking the URL query string and if it contains a parameter with a value that matches our city name, then we should return the data pertaining to that city.
If you are confused about URL query string you can check out this Link. It will help you understand the different aspects of a URL.
In order to access the query string parameter using express we need to use req.query see the code below:
              const express = require('express');  // import express
const app = express();  // initialize express              // import our fake weather data
const fakeWeatherData = require('./data.js');              // GET route
app.get('/weather', function(req, res) {
                // if no city parameter exists
                if (!req.query.city) {
                res.send({"status": "error", "message": "Please enter a city name"})
                } else {
                res.send(fakeWeatherData[0])
                }
});              app.listen(3000, function() {
                console.log('listening on port 3000...');
})
Before I dissect the code above note that I changed the path to now be http://localhost:3000/weather. I did this to make our URL more descriptive.
If we do not supply our app with a query string with a parameter of city then we return a json error message. You can test this out by restarting your express server then going to the following path http://localhost:3000/weather/?city. In fact if you go to any /weather path you will get this error message. To fix this go to http://localhost:3000/weather/?city=ANYTHING. Now we see our city data again but we are only accessing one city's information. Lets work on the logic to get the data based on the city parameter in the URL query string.
              const express = require('express');  // import express
const app = express();  // initialize express              // import our fake weather data
const fakeWeatherData = require('./data.js');              // GET route
app.get('/weather', function (req, res) {              // store the query string parameter in cityName variable
                let cityName = req.query.city.toLowerCase();              // Loop through our fake data array
                for (let i = 0; i < fakeWeatherData.length; i++) {              // if no city parameter exists
                if (!cityName) {
                return res.send({"status": "error", "message": "Please enter a city name"})
                } else if (cityName == fakeWeatherData[i].city.toLowerCase()) {
                return res.send(fakeWeatherData[i])
                }
                }              // if city parameter isn't in our fake data set
                res.send({"status": "error", "message": "This city isn't in our database"})              });              app.listen(3000, function () {
                console.log('listening on port 3000...');
})
The logic above is pretty simple. We are just accessing the city name typed by the user but getting it from our query string. This string is stored in req.query. Then we loop through our fake weather data array and check if we have any matches. If we do then our API should respond with the data related to the city.
OK now lets test our API! if we go to the path http://localhost:3000/weather/?city=tokyo. This is what we should see:

You can test it with any city in our fake data set and it should return the city data and if the city data isn't available or no city was entered then we should get an appropriate error.
Although we are close to being done, we are not quite there yet. One last thing should be considered. We will be accessing this API through another application located in a different domain, so we will have to enable all cross-origin resource sharing. Luckily there is a node package that can help us with that called cors. To install it we just type the following in our terminal:
npm i --save cors Our finalpackage.json should now look like this:
              {
                "name": "fake_weather_api_starter",
                "version": "1.0.0",
                "description": "",
                "main": "index.js",
                "scripts": {
                "test": "echo \"Error: no test specified\" && exit 1"
                },
                "author": "Maher Alkendi",
                "license": "ISC",
                "dependencies": {
                "cors": "^2.8.4",
                "express": "^4.16.4"
                }
}
To enable all CORS requests we just have to add a few lines of code. Our finalindex.js file should now look like this:
              const express = require('express');  // import express
const app = express();  // initialize express
const cors = require('cors'); // import cors package              // import our fake weather data
const fakeWeatherData = require('./data.js');              // Enable all CORS requests
app.use(cors());              app.get('/weather', function (req, res) {              // store the query string parameter in cityName variable
                let cityName = req.query.city.toLowerCase();              // Loop through our fake data array
                for (let i = 0; i < fakeWeatherData.length; i++) {              // if no city parameter exists
                if (!cityName) {
                return res.send({"status": "error", "message": "Please enter a city name"})
                } else if (cityName == fakeWeatherData[i].city.toLowerCase()) {
                return res.send(fakeWeatherData[i])
                }
                }              // if city parameter isn't in our fake data set
                res.send({"status": "error", "message": "This city isn't in our database"})              });              app.listen(3000, function () {
                console.log('listening on port 3000...');
})
There we go! we just created a fake weather API. But this isn't too exciting on its own. Lets create a simple UI to actually use this data.
If you made it this far I salute you! Keep in mind that this is only part one of this two part series. If you would like to see how we access the data, from the API we just created, from a front-end application. check out part two.
If you have any questions or suggestions then feel free to drop a comment below or send me a message on my twitter and I'll be happy to respond!
How To Build A Full Stack App
Source: https://itnext.io/learn-how-full-stack-apps-work-by-building-a-simple-one-using-javascript-part-1-38e237694012
Posted by: knottsscou1949.blogspot.com
0 Response to "How To Build A Full Stack App"
Post a Comment